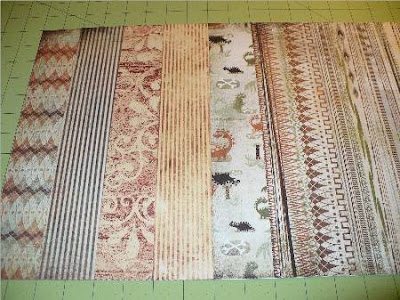
PaperScrapbooking is a form of “paper crafting.” Paper is simply paper until you cut it, tear it, crumple it, soak it, sand it, spray it, layer it, emboss it, embellish it, or even burn it! Even before you can do any of that, however, you need to buy it! Buying paper is an art in itself! I know, you’re laughing, but keep reading! I write with eight years of experience and a stack of paper probably a foot tall that I will never use.
Most of your area craft stores--not to be confused with an independently-owned local scrapbooking store (LSS)--provide coupons--online, newspaper, and/or mail--for 40-50% off a single regularly-priced item. These addictive coupons generally expire within a week (so you better hurry on over now—I’ll wait), and are usually honored by the other area craft stores. If you have already begun to assemble scrapbooking materials, then you know full well that you CANNOT go into a store and buy ONE item—and this is exactly what your craft stores are banking on (pun intended!). While these coupons can be a vital part of wise shopping (see blog post of July 21), they should not be used on impulse buying just because you have the coupon! While you are looking around the craft store with that coupon in hand, you will also notice that most everything you really want to buy is 30% off already, so you can’t use that coupon! And, really, isn’t 30% almost as good as 40%? And pretty close to 50%? No, it’s not. I will admit that I was a coupon addict for quite a few years. I must also admit that I am—and remain—a paper “junkie.” It’s just that now I buy less paper.
Recently on the About.com Scrapbooking forum, Karen posted a question asking, “Has the economy affected your scrapbook spending?” All but one response was in the affirmative, although some members are curtailing spending as the responsible thing to do, not solely because of the economy. Here’s a response from Kathy Canuel (you can check out her scrapbooking blog here):
I think that I've started taking eco-crafting a bit seriously lately, too. I've been SO bent on using my stuff and not buying new supplies. So I really take that as a double meaning thing--ecologically sound AND economically sound crafting.
Becky agreed, and provided her personal strategy: “I'm just using my stash like a store now instead of going out to buy more. It's a good feeling!” I couldn’t agree more! Here’s just an excerpt of my response to Karen (we all know I am pretty wordy):
Another thing I have done is to stop buying "pads" of paper on sale at [craft store]! I would use the 5 or 6 sheets from the pad that I really loved, and the rest would sit. The "on sale" cost was $9.99. Now, I go to my LSS and buy 6 sheets of paper that I really love and use them all. The cost is $6.00. I have saved $4 and have not added unwanted paper to my stash. This math might not work for all of us, but seems to make sense to me. I am definitely not a tree hugger, but I do want to conserve where I can.
The point of all this is to encourage you to be responsible in the purchase and use of paper. Make sure that you need what you buy and like it enough to use it. For beginners, I would say “less is more.” For the first few months, be project-specific when you buy. A second thought to keep in mind is that purchasing card stock can be just as costly! You may have yet to discover how many shades of white and black are out there just waiting to be purchased and added to your “stash.” Again, when purchasing card stock, be project-specific! Take your patterned paper or photograph over to where the card stock is stocked (sorry, I couldn’t resist that one!), and match up your colors.
There have been several references here to “stash,” so let me define it. Hmmmmmm, a scrapbooking “stash” is everything that you bought with the best of intentions, but have never used AND you eventually forget that you even have it AND you buy something to replace it! In real life, stash would be considered “stuff”—your baggage! Travel light!
How sharp are you?
Let’s talk cutting…cutting photos, cutting paper, cutting mats (both kinds), cutting time. Okay, that last one will be another post!
Photos—to crop or chop
Stop and listen! The #1 rule in scrapbooking photos is never, EVER cut a one-of-a-kind-can-never-be-replaced-original photo! If you are wondering, #2 is measure twice, cut once! When it comes to cutting photos, you have two choices: Crop or Chop! Electronic cropping of your photos is not actually cutting the photo at all, but, rather, cutting OUT what you don’t want in the photo--for instance, a stray elbow or relative--before you print the picture. Actually cutting your photograph is done more for its artistic value—for instance, cutting a photo into a circle or because your 4x6” photo won’t fit into your 4x4” space. Unless you are very talented, I would avoid scissors for either of these artistic options. Purchase a few basic punches (remember that 40% off coupon?). I would recommend starting with a 2-1/2” circle punch and a 2” square punch. You should also invest in a good quality rotary trimmer or blade trimmer for those straight cuts.
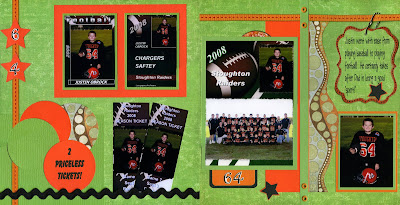
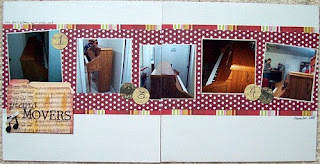
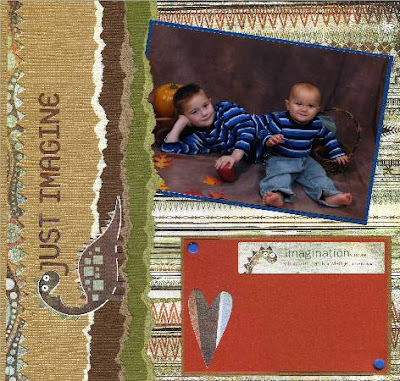
Here's an example of cutting photos for artistic effect. It serves also as an example of matting photos with a one-quarter inch border (see below). This layout is of my grandson Justin.

Cutting Paper for Matting Your Photos
Let me begin by saying that your first option is not to mat at all. Though rare, I believe there are times when matting actually distracts from your photo. I chose to use no matting on the focal picture in the following layout because I was tucking it behind a piece of hand-cut patterned paper. See what you think:

If you decide that matting will enhance the presentation of your photo, then you have several choices.
- eyeball matting
- 1/4" border matting
- 1/2" border matting
- double matting
- triple matting
Rebecca Ludens, About.com’s Scrapbooking Guide, has prepared a short video on a simple matting technique. What Rebecca has done is what I call “eyeball matting.” If it looks good, cut it! If you need to be more precise, then you must do the math! It’s really pretty simple: if you have a 4"x6" photo and want a one-quarter inch border around it, cut your mat 4-1/2" x 6-1/2"; for a one-half inch border all around, cut the mat 5" x 7 ". Double matting is simply adhering your photo to a one-half inch border mat, and then adhering that to a one-inch border mat. As Rebecca mentioned in the video, double matting of your focal photo sets it apart from the rest. You can even vary the matting size when you double or triple mat. Here are some examples of both double and triple matting:

 Cutting Mats
As an aside, I will mention here that you most definitely need to make one of your first purchases a self-healing cutting mat. This will become your all-around work surface and will forgive you many things over its lifetime. You will not only cut on it, but you will glue on it, hammer on it, spill on it, ink on it, paint on it, glitter on it and maybe even drool on it! It can be purchased from a fabric store, a craft store, or even, most times, from your LSS. Make sure that yours has at least one-inch grid lines printed right on it! And, yes, Ladies, size DOES matter! The bigger, the better! The first mat I purchased listed the dimensions as an ample 12” x 18”. However, the outside grid markings were, in reality, only 11" x 17". Of course, it was my lack of attention to detail, but my 12" x 12" layout actually measured 11" x 12" when I was done. My daughter continually reminds me that there are no “oop’s” in scrapbooking, just further opportunities for creativity! With that in mind, I was able to save my layout by adding a coordinating 1" strip of patterned paper to the bottom.
The Finishing Touches
The Album
I have found it a good idea to place each finished layout into a protective sleeve, whether it be just a holding place or inside what will become the finished album. It’s also a good idea not to keep moving your layouts from sleeve to sleeve. Each move has the potential to damage your layout.
If you are creating a themed album, for instance a honeymoon trip to Hawaii, then, by all means, purchase that album in Honolulu made out of tree bark. Or a Disney album. Or one with an open window for your surname for a heritage album. But, for most albums you will create, you need to be less extravagant! To my growing list of “scrapbooking sins,” you can add, “She paid too much for trendy albums.” Like your mother told you about “goodness,” it’s what’s inside that counts! With rare exception, my rule now is not to buy an album if it’s not on sale! My best buy? An orange (before it was an “in” color) cloth-covered album for $4 and change! Go me!
You will find there are choices to be made in this area in addition to “How much?” Again, it’s a size thing:
- 12" x 12" (most popular)
- 8-1/2" x 11"
- 8" x 8
- and even 6" x 6"
as well as . . .
- 3-ring
- post-bound (most popular)
- strap-bound
- spiral-bound
I think this is all pretty much self-explanatory and a matter of personal preference, but I will go on record as saying my favorite is definitely the 12" x 12" post-bound album. It’s easy to add posts to the post-bound album to enlarge it (if you anticipate adding protector sheets to the 10 included in the album you purchase, buy them at the same time as you buy your album to make sure they are the same size), and the larger-size album gives you ample room for lots of pictures, embellishments, and journaling . . . which is a perfect segue to the last item on the agenda today before we get creative!!
Journaling
Journaling creates in me great fear! As a writer, I take great pleasure in playing with words. I love creating catchy page titles! Journaling, not so much. Oh, sure, the 5 W’s (who, what, why, when and where) are pretty straightforward. Tossing in a “how” is even ok! Beyond that, I am at a loss for words. Me! Can you imagine? And, when I actually do come up with the words, I can only let my computer print them out. I don’t like my handwriting. I cannot “journal” with my hands—or, rather, handwriting. For these reasons, journaling for me is the last step in a layout. Here’s where the fear comes in—fear of misspelling something, fear of making a mistake, fear of leaving a word out as I copy words onto the paper, fear of ruining my layout! The closest I have ever come to actually hand journaling was on a layout for my grown daughter. I hand wrote on a transparency (it only took three tries), then adhered that to my layout with brads! I know that someday in the future, my daughter will take comfort in reading my message to her in my own hand writing. A final note: an important part of journaling is dating your work. I prefer including the date the photos were taken (as closely as possible), but others include the date the page was created. Either is fine, just be sure to include one or the other--or both!
I’d like to talk to you now about journaling pens and other writing tools. I’d like to, but with almost no experience, what can I say with any credibility? My suggestion would be to purchase a good set of journaling pens—look for words such as . . .
- archival quality
- permanent
- fade resistent
- water proof
- smudge proof
...and then take their promises with a grain of salt and caution!
Thanks for joining me again today. If you have not already done so, please take a moment now to sign up to "follow" my blog. You don't need to add a photo, but I would love it if you did! See you next time . . .
